Little known features of iTerm2
iTerm2 has a lot of little-known features that can make development much easier.
#Smart Selection
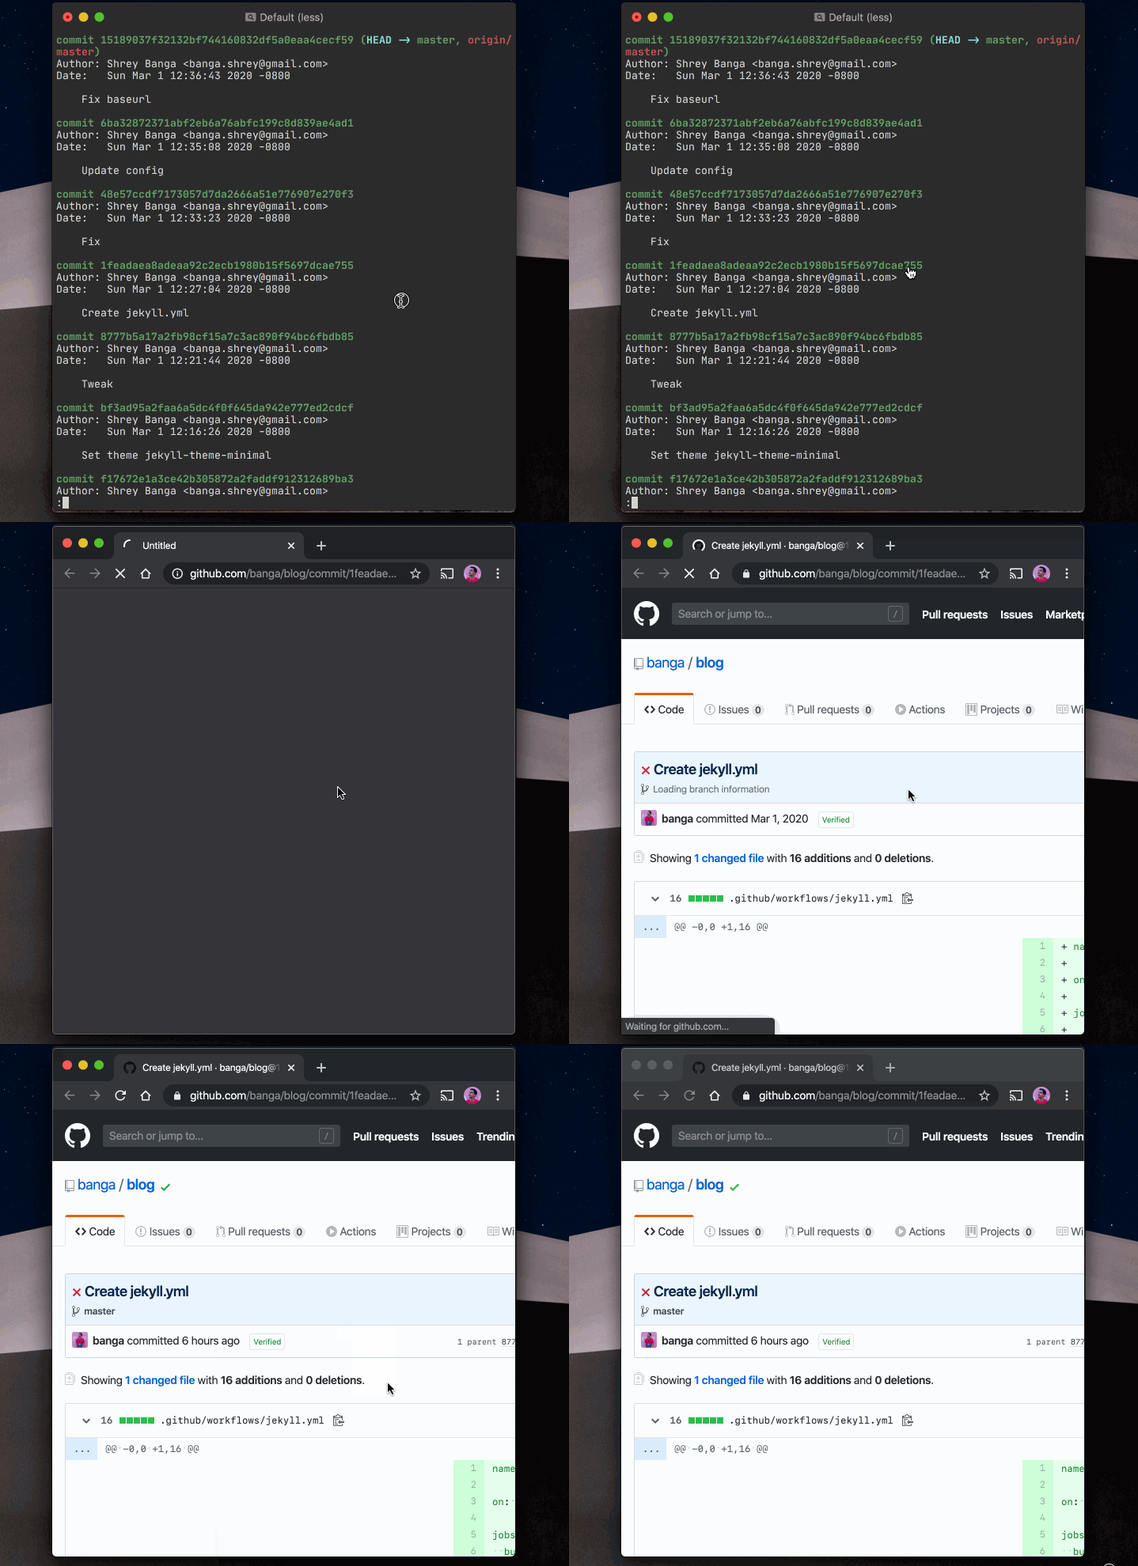
If you work in a large codebase, chances are you often need to open commits on Github, or revisions in Phabricator or tickets in your in-house bug tracker. This usually involves copying and pasting an identifier into a URL and opening that in your browser. For example, you may want to open commit hashes or PRs on Github with a single click. You can make iTerm2 recognize arbitrary ids and take custom actions using them when they are Command-clicked via Smart Selections.
Here are a couple of examples:
#Open commits on Github

To make Command-clicking on a commit hash open it in Github, do the following:
- Install hub
- In your iTerm2 Preferences, go to
Profiles -> Advanced -> Smart Selection -> Edit - Click the
+button to add a new rule and set theRegular Expressionto[0-9a-f]{7,40} - Click on
Edit Actions...and add a new action - Set the
ActiontoRun Command... - Set the
Parametertocd "\d" && /usr/local/bin/hub browse -- commit/\0. You may have to update the path tohubhere if you installed it to a different directory.
Once this is done, Command-click on a commit hash in iTerm2 should open it in its respective repository if it exists on Github. You can customize this technique to open PRs and Issues on Github as well.
#Open revisions in Phabricator
- In your iTerm2 Preferences, go to
Profiles -> Advanced -> Smart Selection -> Edit - Click the
+button to add a new rule and set theRegular ExpressiontoD[:number:]{5} - Click on
Edit Actions...and add a new action - Set the
ActiontoOpen URL... - Set the
Parametertohttps://secure.phabricator.com/\0or a similar URL for your organization.
#Dynamic Profiles
If you work on a project that requires starting a number of terminal sessions in specific conditions, it can get annoying to get your environment running from scratch. iTerm2's Dynamic Profiles allow you to create custom profiles that can depend on other profiles. You can use this to create a hierarchy of profiles that share your common settings but run different commands on startup.
For example, say your project always needs you to be running npm run build, npm run server and npm run worker during development. You can use dynamic profiles to start iTerm2 with all of these commands running as follows:
- Generate four GUIDs by running
uuidgenin your terminal four times and copying the results. - Create a file in
~/Library/Application Support/iTerm2/DynamicProfileswith these contents (fill in the parts in<...>):
{
  "Profiles": [
    {
      "Name": "Development",
      "Guid": "<guid1>",
      "Dynamic Profile Parent Name": "Default",
      "Working Directory": "<path-to-your-project>",
      "Custom Directory": "Yes"
    },
    {
      "Name": "Build",
      "Guid": "<guid2>",
      "Dynamic Profile Parent Name": "Development",
      "Initial Text": "npm run build"
    },
    {
      "Name": "Server",
      "Guid": "<guid3>",
      "Dynamic Profile Parent Name": "Development",
      "Initial Text": "npm run server"
    },
    {
      "Name": "Worker",
      "Guid": "<guid4>",
      "Dynamic Profile Parent Name": "Development",
      "Initial Text": "npm run worker"
    }
  ]
}
- Reload iTerm2
These profiles should now show up in iTerm2 as dynamic profiles. You can then start sessions with these profiles to create a window arrangement and hit Command-Shift-S to save it. Then you can start all of these sessions at any time by just pressing Command-Shift-R or tell iTerm2 to open the arrangement when it starts! Check out https://blog.andrewray.me/how-to-create-custom-iterm2-window-arrangments/ for a detailed guide on window arrangements.